Laser Cutter 3D Mode
The Laser has a couple of different modes you can set it to, with "Basic" being the most common, since it is used for cutting and normal etching. However, there are some fancier modes that you can switch to, with "3D" being one of them. As the name implies, it will engrave not only on the XY direction, but also Z. It achieves this by adjusting the power as it etches, creating a 3D effect. This opens up a lot of possibilities!
Preparing Your Project
[edit | edit source]Before you prepare your project and send it to the laser, it's useful to know how this mode works internally so you can design accordingly.

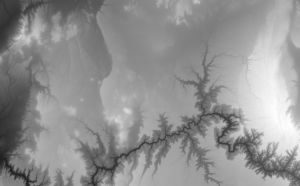
3D mode is very similar to the basic raster mode, but instead of dithering images to give the effect of lighter or darker colors, it will use that brightness to determine how much power to use in that area. So, essentially, darker colors means more power, which means the groove will be deeper. A black pixel will be engraved at full power; a white pixel will be left untouched.
Now that you know how the 3D mode operates, it's time to set up your project!
Unlike what you are probably used to, it is unwise to set your document size equal to the laser bed's size, since in the 3D mode, the laser takes into account everything you send it, including totally white areas (it will just attempt to cut them at zero power). (TK: check if making the document transparent fixes this?) Instead, make your document size roughly equal to the thing you are going to be etching.
If you want to follow along, or just want to check out an example before starting on your own project, you can download this 4x4" sample file which includes a couple different gradients, so you can see how they turn out on the laser. (download: Media:3d_gradients.svg)
We will be using this example file to simplify things. If you are using your own project, just replace the appropriate values where necessary.
Preparing the Laser
[edit | edit source]Once you have set up your project as described above, we can move on to setting up the laser with the appropriate settings to get a 3D etch.
- The first thing you will want to do is jog the laser to where you want the top-left of the etch to start and set that to the origin (instead of the usual top-left corner of the material itself).
- Next, set the laser preset in Illustrator and the laser preferences as usual. In the "Advanced" tab, make sure "Raster Type" is set to 3D.
- Now, in the "General" tab, you will probably want to force the job type to Raster, just to be safe.
- Still in General, set your raster settings like you usually would for the material you are using, but keep this in mind: the power you set here will be considered the maximum power for the job — that is, entirely black surfaces will be output at this power. You may want to tinker with this value to see what results you like best. I recommend starting at 50% max power and going up or down from there, depending on what you're trying to achieve.
- Finally, and this is probably the most important part(!): set the "Piece Size" to match your document size (if you are using the example from earlier, set this to 4x4"). If you do not do this, you will end up with an hours-long job! This is because, as mentioned earlier, the laser takes into account ALL parts of the document, including white areas, when in 3D mode.
3D engraving doesn't go very deep, even at full power. Consider testing on scrap first. For deeper cuts, run the job two or three times.
Fire the Lazzor!
[edit | edit source]Once you've followed the steps above, making sure to save the settings, you are ready to print! Send the job as usual, and if it does not end up as a 5-hour job, you probably did it correctly! It may be a good idea to perform a dry run by lifting the hood and then pressing "GO", to make sure it's doing what you want it to.
Further Reading
[edit | edit source]If you want to explore 3D mode a bit more and see Epilog's official guidance on it, check out their manual — CTRL+F for the "3D Engraving" section (should be on pg 171 of the PDF itself).
Examples from Epilog: