Spooky Box

Introduction
[edit | edit source]The Spooky Box is a proposed generic interface for use with Processing. The idea is to provide 3-4 potentiometers (knobs) and 3-4 push buttons that can be interfaced with a simple Processing library. It will be used as the primary interface for The Spooky Visuals at the NYC Resistor Halloween party 2008.
Hardware
[edit | edit source]Introduction
[edit | edit source]The Spooky Box is the actual hardware interface. It will be built using the Arduino as a platform. A software emulation prototype will be built first so that developers can begin writing code against the interface without having one. Both the hardware and software emulator will be open source.
Parts List
[edit | edit source]- 3 x 10k Potentiometers
- 3 x Potentiometer knobs
- 4 x Push buttons (red, green, blue, yellow)
- 1 x 12"x24" black acrylic
- 2 x Hinges
- Clasp
Firmware
[edit | edit source]Here's the Arduino firmware which implements version 2 of the protocol...
Sample Sketches
[edit | edit source]Connect The Dots
[edit | edit source]

A simple game by Justin Day that allows players to connect dots to reveal a picture. A timer gives them a short (but fair) amount of time to connect all the dots before getting a giant "FAIL" message. Those who connect them all will get a "FTW" message instead. An edit mode allows developers to add additional pictures using the Spooky Box interface.
- Button 1 - Add dot (edit mode only)
- Button 2 - N/A
- Button 3 - Save dots (edit mode only)
- Button 4 - N/A
- Knob 1 - Move horizontally
- Knob 2 - N/A
- Knob 3 - Move vertically
Download the Connect The Dots sketch
Cthulhu
[edit | edit source]

What's the scariest thing available under a free license? According to Jens Ohlig it's the works of H.P. Lovecraft, specifically "The Call of Cthulhu". In this sketch you can use the buttons to page through the story and use the knobs to adjust the hue of the terrifying picture.
- Button 1 - Scroll the story up
- Button 2 - Scroll the story down
- Button 3 - Scroll the story up
- Button 4 - Scroll the story down
- Knob 1 - Adjust the red level
- Knob 2 - Adjust the green level
- Knob 3 - Adjust the blue level
LivingDead
[edit | edit source]

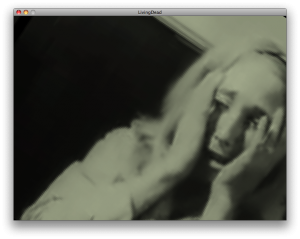
The 1968 classic Night of the Living Dead defined what most of us think of a zombie. It has also lapsed into the public domain. In this sketch the viewer can use the Spooky Box to control the movie somewhat like a television. Use the knobs and buttons to scrub, tint and adjust the vertical/horizontal/rotational hold. To use this sketch you'll need to download the 256kb MPEG4 version of the movie from archive.org. Place the movie in the data directory of the sketch.
- Button 1 - Scrub Mode
- Knob 1 - Set absolute movie position
- Knob 2 - Set movie speed/direction
- Knob 3 - N/A
- Button 2 - Color Mode
- Knob 1 - Adjust the red level
- Knob 2 - Adjust the green level
- Knob 3 - Adjust the blue level
- Button 3 - Hold
- Knob 1 - Vertical Hold
- Knob 2 - Rotation/Scaling
- Knob 3 - Horizontal Hold
- Button 4 - Randomize everything
Download the LivingDead sketch
Paranoids
[edit | edit source]

Jacob Joaquin created a interactive Rorschach inkblot test because they so often turn out like menacing creatures. Or is that just in his head? The viewer can use the buttons and knobs to make their own inkblots and make up their own minds.
- Button 1 - Change paranoid
- Button 2 - Change color mode
- Button 3 - Change ellipse size
- Button 4 - Toggle animation
- Knob 1 - Set the stroke alpha level
- Knob 2 - Set the fill alpha level
- Knob 3 - Adjust the tint
Spookbox
[edit | edit source]

Liz Arum created four spooky sketches in one, each with its own distinctive style. In the first mode the viewer can just make out intricate spirals swirling around in the background while an ominous skull bounces across the foreground. The second and third mode feature a colorful slime that runs down or across the screen. In the final mode a pair of cats eyes stares the viewer down while colorful slime fills the screen.
- Button 1 - Skull mode
- Knob 1 - Adjust the spiral
- Knob 2 - Adjust the spiral
- Knob 3 - Skull vertical offset
- Button 2 - Slime mode
- Knob 1 - Adjust the red level
- Knob 2 - Adjust the green level
- Knob 3 - Adjust the blue level
- Button 3 - Horizontal slime mode
- Knob 1 - Adjust the red level
- Knob 2 - Adjust the green level
- Knob 3 - Adjust the blue level
- Button 4 - Cats eyes mode
- Knob 1 - Adjust the red level
- Knob 2 - Adjust the green level
- Knob 3 - Adjust the blue level
Zombie Panic
[edit | edit source]

Svenja has created a panic! Use the Spooky Box to control a floating zombie head while he zooms around the NYC Resistor HQ and eats floating brains. A brain counter will keep track of your score while you chomp away. What happens when you eat 100 brains?? Guess you'll just have to find out!
- Button 1 - Move the zombie up and left
- Button 2 - Move the zombie up and right
- Button 3 - Move the zombie down and left
- Button 4 - Move the zombie down and right
- Knob 1 - Adjust level of zombie panic
- Knob 2 - Adjust zombie speed
- Knob 3 - More brains!
Download the Zombie Panic sketch
Emulator
[edit | edit source]The Software Emulator for Spooky Box is ready to go. Grab it from one of the links below. The emulator only uses revision 1 of the protocol. Fortunately it's backwards compatible with the library, so it's still just plug-and-go (YAY!)
- SVN access is at http://svn.nycresistor.com/projects/spookybox_server
- Just download it at http://www2.justinday.com/SpookyBox-Server.zip
Using the Emulator
[edit | edit source]Just load the emulator application, or launch it from Processing and leave it running. The library will automatically connect to it if you specify SpookyBox.NETWORK as the method to connect. Use the mouse to press the buttons and click on the knobs and drag left or right to turn them.
Technical Details
[edit | edit source]The server listens on port 5204. Clients who connect will be bombarded by bytes every 3rd frame (approx 10ms).
Processing Library
[edit | edit source]The Processing Library for Spooky Box is ready to go. It works over network (for the emulator) and serial (for when we have a physical device). Grab it from one of the links below.
- SVN access is http://svn.nycresistor.com/projects/spookybox_library
- Just download it at http://svn.nycresistor.com/projects/spookybox_library/spookybox-1.1.zip
Using the Library
[edit | edit source]Using the Processing library couldn't be simpler. Drop the spookybox folder into your Processing application's libraries directory. Then restart Processing. You should be able to import and go.
NOTE: I've had some trouble with some versions of Processing. If you can't get it to work, try copying the contents of the net/library or serial/library folder into spookybox/library folder.. Generally it's worked really well with network mode, it's only the serial mode (for the live in person spookybox) that's given me trouble.
Sample Code
[edit | edit source]import com.nycresistor.processing.*;
SpookyBox mySpookyBox;
void setup() {
// When connecting an actual device, you would use SpookyBox.SERIAL
mySpookyBox = new SpookyBox(this, SpookyBox.NETWORK);
// NOTE, If you want to override the network or serial port settings you can
// use a constructor like this:
// mySpookyBox = new SpookyBox(this, SpookyBox.NETWORK, "192.168.1.50", 8080);
// mySpookyBox = new SpookyBox(this, SpookyBox.SERIAL, Serial.list()[0], 9600);
}
void draw() {
// Knobs return 0-1024. Buttons return true or false.
println("knob1=" + mySpookyBox.getKnob1() +
" knob2=" + mySpookyBox.getKnob2() +
" knob3=" + mySpookyBox.getKnob3() +
" button1=" + mySpookyBox.isButton1() +
" button2=" + mySpookyBox.isButton2() +
" button3=" + mySpookyBox.isButton3() +
" button4=" + mySpookyBox.isButton4()
);
}
// Also available in 1.1 of the library are:
// mySpookyBox.wasButton1();
// mySpookyBox.wasButton2();
// mySpookyBox.wasButton3();
// mySpookyBox.wasButton4();
//
// These will return true if the button was pressed
// since the last time you asked.
Protocol
[edit | edit source]Revision 1
[edit | edit source]The first revision is really simplistic. It simply sends out the state of all the knobs and buttons every 100 ms or so. It doesn't work very well, but i'll document it here for reference. The server sends three 255 bytes, then two bytes per knob, then one byte per button. The knobs are represented as integers between 0 and 1024 which is represented by a 16-bit big endian integer in the protocol.
Revision 2
[edit | edit source]Revision 1 is kind of laggy. Instead of sending data every 100 ms, let's send it only when a knob is turned or a button is pressed. All events will generate a one or two bytes.
| Bit | 7 | 6 | 5 | 4 | 3 | 2 | 1 | 0 |
|---|---|---|---|---|---|---|---|---|
| 1st Byte | 1 | Check | Control | Data | ||||
| 2nd Byte | 0 | Data | ||||||
The 1st byte contains the signature bit, the check bit, the control selection and data. For button updates the data section contains the values of all four buttons, where bits 3..0 contain buttons 1..4. For knob updates the low nibble contains the low nibble of the high byte of the knob word shifted left by 1, plus the most significant bit of the low byte of the knob word.
The 2nd byte is only sent when a knob update occurs. It contains the low byte for knob word except for the most significant bit is always 0.
The check bit is set if the data portion of the update (both bytes for knob updates) is even.
Clients can identify the first byte by checking signature bit. If not set then you've got the 2nd byte.
Clients can request a full update using the Revision 1 protocol by sending a single 0xFF byte. They should do this when starting to initialize the values, and periodically to make sure they're OK.