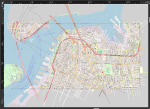
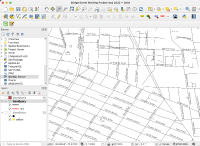
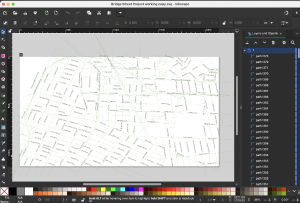
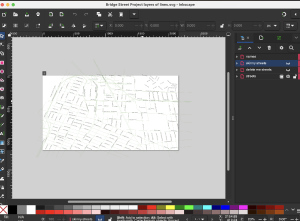
Bridge Street Neighborhood map
When last we left our heros[edit | edit source]
This project was started pre-pandemic. The working files long lost, an svg was found in an old email account in 2025 and successfully cut on some cardboard. A test mount was done on 8.5 x 11 paper (damn Inkscape and its lack of posterizing print tools). Feedback on the test was in retrospect obvious: what's a map without street names. So time to recreate the project from the start - since that seems likely to be faster than hand adding every street name. Damn. If only time and space didn't degrade anything not archived.
Source Data[edit | edit source]
Attempts:
(1) OpenStreetMap - export https://www.openstreetmap.org/#map=15/40.69583/-73.98953 as an SVG. This successfully loads up in Inkscape (after causing Inkscape to crash a couple few times. Whatevs. Free and open source and I'm grateful for it.)

(1a) I initially grabbed the 'Standard' map layers from OpenStreetMap. That's entirely too much data to munge. Trying the "Tracestrack" map layer. Alas! Tracestack is not a downloadable/exportable layer. Only "Standard", "Cycle Map", and "Transport Map".
(1b) Let's see what the cycle map give me! Well, that's really not much of an improvement. Still hundreds and hundreds of layers in Inkscape.
(2) Still OpenStreetMap, but Guillaume has suggested "if you want just the buildings or just the streets, I'd use qgis, the quick osm plugin, and export to svg" - so let's try that next.
(2a) Really enjoying the QGIS tutorial. What was it I was trying to accomplish again?


(2b) Grabbed the "CycleOSM" map layers from OpenStreetMaps. This map layer version permitted me to grab a section large enough to include the two bridges, but with few enough objects to allow export directly from the web version of OpenStreetMap. The export is in '.osm' format, supported by QGIS (phew) (2b1) in classic fashion I lost 30 minutes struggling to understand why my .osm wouldn't load up per the training modules and forum postings, but the actual problem was my download choked and the .osm really was a 2kb file with a single point node on it. I was not failing at the 'file open' step; I had already failed at the 'data acquisition' step.

(2b2) extra fun side quest as I waste time trying to figure out why the QGIS software is suddenly unresponsive, which is actually the screenshot of the QGIS software not responding to clicks.
(2c) To get street labels to turn up - double-click "lines" layer; "Labels"; from the Value drop-down "name". However - that gets me All The Names, including subway and bus line names. I'm looking for less. Ugh no, I'm looking for different. Names like "Flatbush" are missing, and "BMT Brighton Line" appears instead.
(2d) This has been successful enough to give me a path I could brute force a laser cuttable map from. Pause here and make one more attempt before pursuing the brute force way forward.
(3) OpenStreetMap as a direct data source in QGIS. Oh wait, that's what Guillaume actually suggested above. Heh, takes me a while to listen, don't it.
(3a) Install the QuickOSM plugin. I ran the test query (key=amenity, value=toilets, town/village=London) and holy high hell but this feels like magic. It loaded two layers directly into QGIS! I guess I wouldn't have appreciated this if I hadn't done (1) & (2) first.
(3b) Identify the key-value pairs and the anchor words that get me what I want out of Brooklyn. So that means going to the Open Street Maps docs! ------ Slow your roll! If you continue down the QuickOSm user docs you find there are presets. Let's see what's in the downtown Brooklyn preset

(3c) Vector > QuickOSM > Map preset > Urban ; In = Brooklyn. Well that's everything I need for sure. So freaking easy once found.
(3d) key value pair reference for Open Street Map https://wiki.openstreetmap.org/wiki/Map_features
(3f) Vector > QuickOSM > Quick query > Preset = "Highways/Streets"; In="Brooklyn". Only checkbox-to-display the layer that looks like streets - it's the second "OsmQuery" in the way it ran today. Then zoom to Bridge Street. Then apply street labels by double-clicking the layer name > Layer Properties > Labels > Single Labels > Value = "name".

Hiccup: Saving![edit | edit source]
Well thank god I took a break to snack on Nan Xiang Express bok chow. I shut down my computer and upon reloading the project had no content! Had I been working into the wee hours (like my youthful unhealthy self used to) I would have fallen entirely apart. Instead - little more manual reading and:
(1) Right click layer, make permanent save as a flat file format (I used "FlatGeoBuf")
(2) Load that permanent layer up as a new layer
(3) Save the project. Optionally delete the temporary layers you no longer need or want.
Check your work by closing the app; shutting down the computer; walking away; having a healthy green snack and coming back and reloading the project. Phew, it's still there.

Choosing the map extent and outputting[edit | edit source]

As I get more comfortable in QGIS, I am taking fewer and fewer notes. Upshot here:
(1) In QGIS define a spatial bookmark that covers the theoretically interesting area.
(2) In QGIS Project > Import/Export > Export Map to PDF > set the Calculate from Bookmark to your selected bookmark. Save.
(3) Open in Inkscape. Choose "Internal Import" so it attempts to preserve text labels as typography.
(4) Successfully opened in Inkscape! Wooooo!
Refining the map in inkscape[edit | edit source]
(1) Export to an SVG. Close everything out and reopen the SVG working file for safety.
(2) Move names to their own layer. Move truly excess streets to a layer named 'delete me streets'. Interesting paths that aren't properly streets move to a layer 'skinny streets'. This lets me work streets and names separately, while feeling confident I haven't permanently deleted something I'll want to bring back later in edits and refinements.
(3) Current attempt: Display the 'streets' and 'skinny streets' layers. Convert to a bitmap with Edit > Make a Bitmap Copy. Move the resulting bitmap to its own layer and SAVE.

(3a) Convert that bitmap to paths with Path > Trace Bitmap > Edge Detection setting. Amazingly that sure seems like it works!

(4) Test cut on May 19 showed that I had shapes not lines. The solution attempt underway is: make a first path by doing "Make a Bitmap Copy" and then "Trace Bitmap" with Edge Detection setting. This gets me some thick streets. Then do the same thing again, emptying out the fill and using "Trace Bitmap" with "Centerline Tracing (autotrace)". Then select the lines and modify the stroke to "Hairline." This seems to have gotten me a set of streets with hairline outlines, which will support cutting.
Skipping ahead to a test cut on May 19 at the space[edit | edit source]
Saved as an svg in inkscape. emailed it to myself (a low value email account) and opened it in Adobe Illustrator.
Set the "Stroke" to 0.01pt in toolbar. Saved the file.
File > Print > Setup button > "Epilog Engraver WinX64 Fusion" then Preferences button.
Selecting "combined" since I have the grid identifier "a0" on it.
oh boy I found some notes on Laser Power#Settings for the new 60W laser using the 2" lens so now i'm setting up the felt sheet with making tape.
eh - felt is porous so it can't focus isn't meaningful in 2025. we use the focus manual tool now! I'm just going to let her rip and see what happens. First attempt:
| speed | power | freq |
| 40 | 50 | 800
no such setting. going with 100% |
It worked just fine!
Test cut May 26 at the space[edit | edit source]
(had some medical stuff, no surprise there, so this project got put down for a week)
Attempt:
(1) email Inkscape svg to self
(2) Open in Adobe Illustrator. Ensure stroke is set to 0.01pt. Save file
(3) File > Print > Setup button > "Epilog Engraver WinX64 Fusion" > Preference button. Select "combined" to test both hairline and raster of the street names. Double the speed based on the test cut from May 19.
| resolution | speed | power | freq | |
| vector | not applicable | 80 | 50 | 100% |
| raster | 400 | 50 | 50 | 50 |
On the final print box - select "only visible layers" and "do not scale"
The raster is cutting all the way through at resolution = 400, speed = 50, power = 50. Try resolution = 400, speed = 100, power = 30 next.
(4) Do all the safety checks on the laser itself then run a red dot, then run a test cut.
Findings[edit | edit source]
- Street names should not cross boundaries between sheets - lining up will be to painful
- Rastering the street names takes for ever - consider doing them in outline, or minimizing how many you do.
- longs streets should not cross boundaries between sheets - Adams Street, Myrtle Street are examples. Get all of a street onto a single sheet of felt
May 30 Thinking thoughts about fonts - and ugh but I have to choose a font earlier in the process! Once I execute "make bitmap copy > trace path" it's no longer lettering it's just curves. To change font, go back to a version recently exported from QGIS. I'm working with "Bridge Street Project layers of thickened lines.svg" on May 30.
Drat! No! You knew this! The moment you convert the QGIS into a pdf and import it into Inkscape using "Internal Import" you lose the fonts. The letters just become curves!
June 3, 2025: thank god I take notes. Day 10 of keto and my brain cells just function differently than I'm accustomed to. Working with file Bridge Street Project May 30 at NYPL in QGIS-LTR. I've downloaded a personal use only license of Whitney - the classic font created by Tobias Freres-Jones for the Whitney Museum [https://frerejones.com/blog/designing-whitney] (I started/ended with Whitney around a deeply enjoyable chat with a craft night visitor about his time at NYU Abu Dhabi and the font coursework he did there, including time spent with Wissam Shawkat). Made it available to QGIS by "adding fonts ( Why do I insist on attempting to follow application instructions, when the real answer on a Mac is do the Mac thing. I used Font Book to install the .ttf files, like a normal human would. Going with Whitney Light 10 point. That having been settled, I now must repeat the steps from the start.
.ttf or .otf) in a fonts subfolder of the folder containing a given project file (.qgs or .qgz). Those fonts will only be accessible when viewing that project." <-- if that ever worked it doesn't work now. So now trying "By adding fonts (.ttf or .otf) on the device in the folder <drive>:/Android/data/ch.opengis.qfield/files/QField/fonts. Those will be made accessible to all projects and individual datasets."
By making different selections during export from QGIS (Advanced Settings > Text Export > Always Export Text as Text Objects) and during import to Inkscape (certify Whitney Light is in List of all PDF Fonts, then Delete missing font text) , I was able to preserve the letters as letters.